

Step 1: Sign Up and Set Up Your Account
The first step is to sign up for a Webflow account. Visit Webflow's website and create an account. You can start with a free plan and upgrade later if needed. Once you're signed in, you can start a new project.
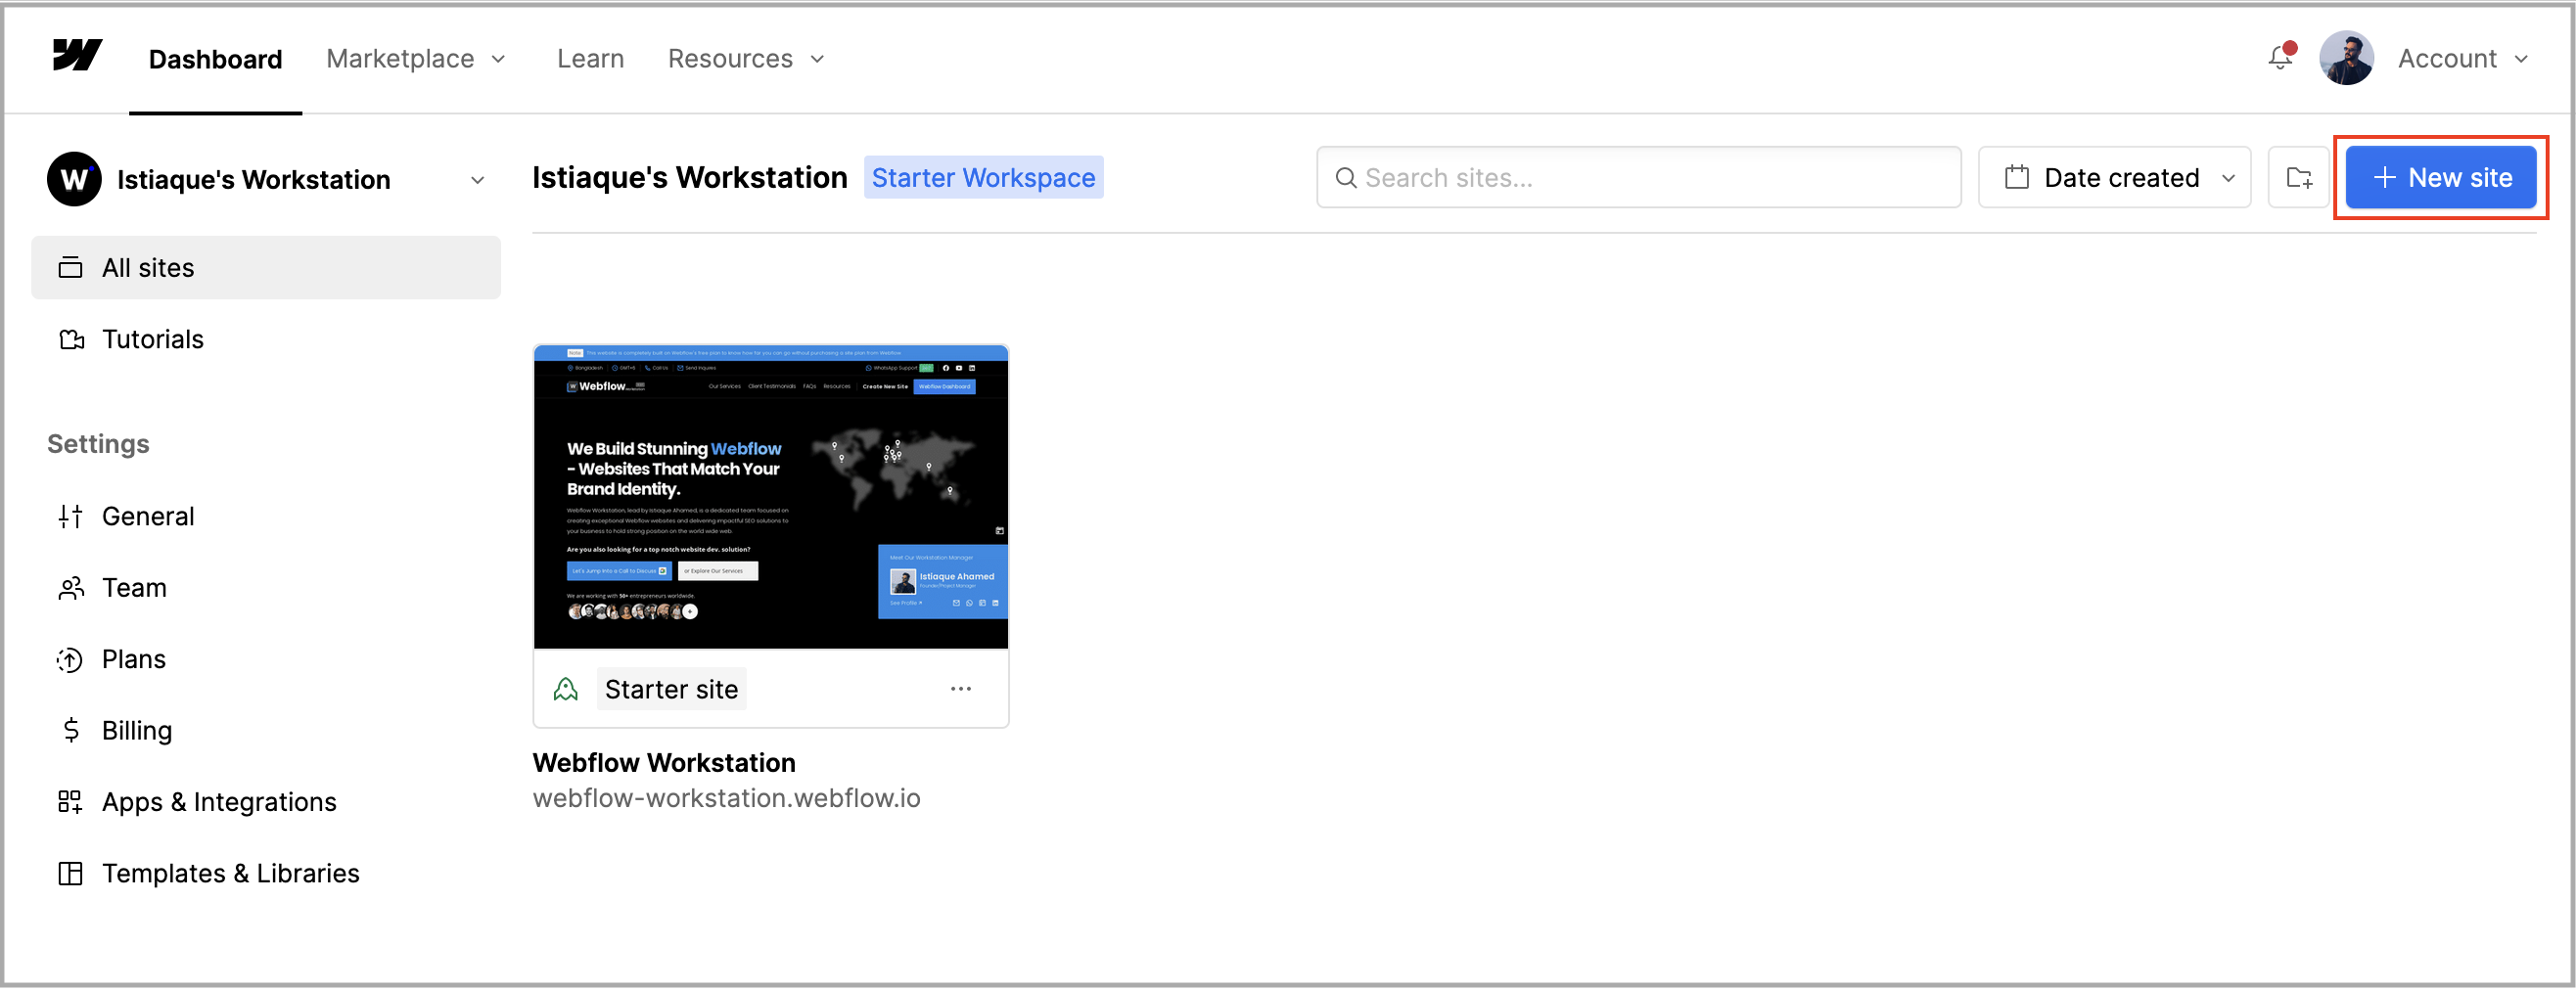
Create a New Project
After logging in, click on the "Create New Project" button. You'll be prompted to name your project and choose a template. Webflow offers a variety of templates that can help you get started quickly. If you prefer, you can start from scratch with a blank canvas.
Step 2: Familiarize Yourself with the Webflow Interface
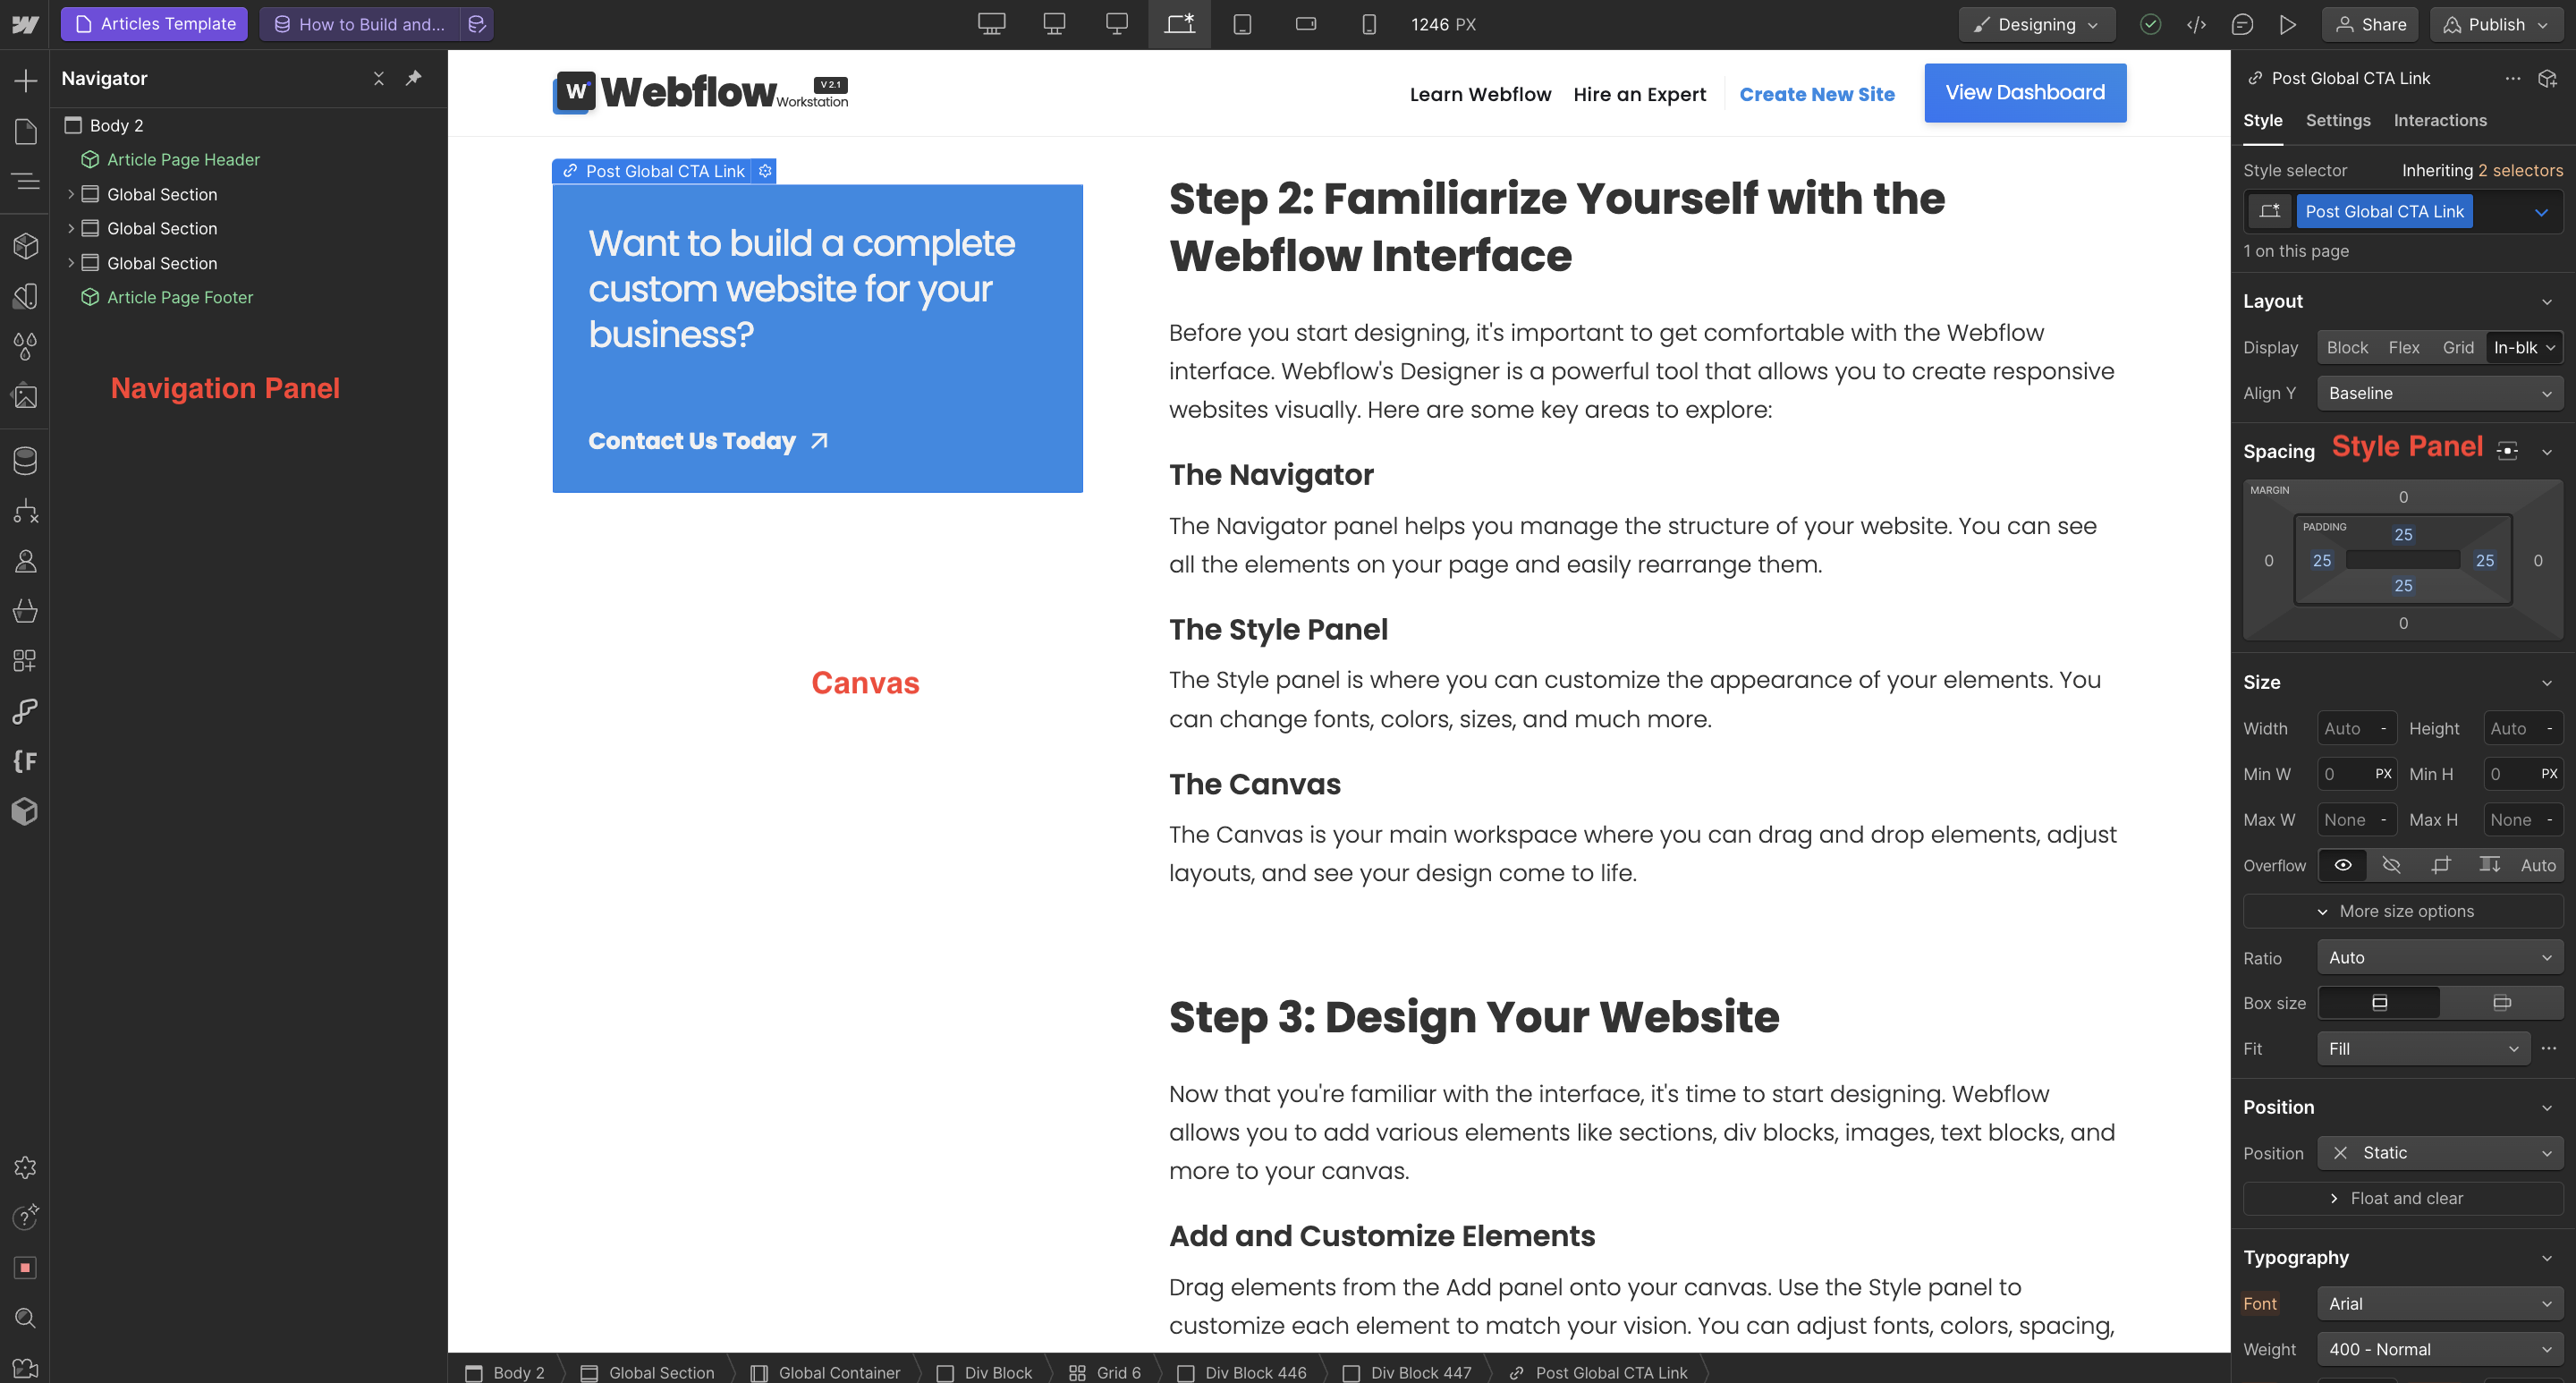
Before you start designing, it's important to get comfortable with the Webflow interface. Webflow's Designer is a powerful tool that allows you to create responsive websites visually. Here are some key areas to explore:
The Navigator
The Navigator panel helps you manage the structure of your website. You can see all the elements on your page and easily rearrange them.
The Style Panel
The Style panel is where you can customize the appearance of your elements. You can change fonts, colors, sizes, and much more.
The Canvas
The Canvas is your main workspace where you can drag and drop elements, adjust layouts, and see your design come to life.
Step 3: Design Your Website
Now that you're familiar with the interface, it's time to start designing. Webflow allows you to add various elements like sections, div blocks, images, text blocks, and more to your canvas.
Add and Customize Elements
Drag elements from the Add panel onto your canvas. Use the Style panel to customize each element to match your vision. You can adjust fonts, colors, spacing, and more to create a unique design.
Create a Responsive Design
Webflow makes it easy to create responsive designs that look great on all devices. Use breakpoints to adjust your design for desktop, tablet, and mobile views.

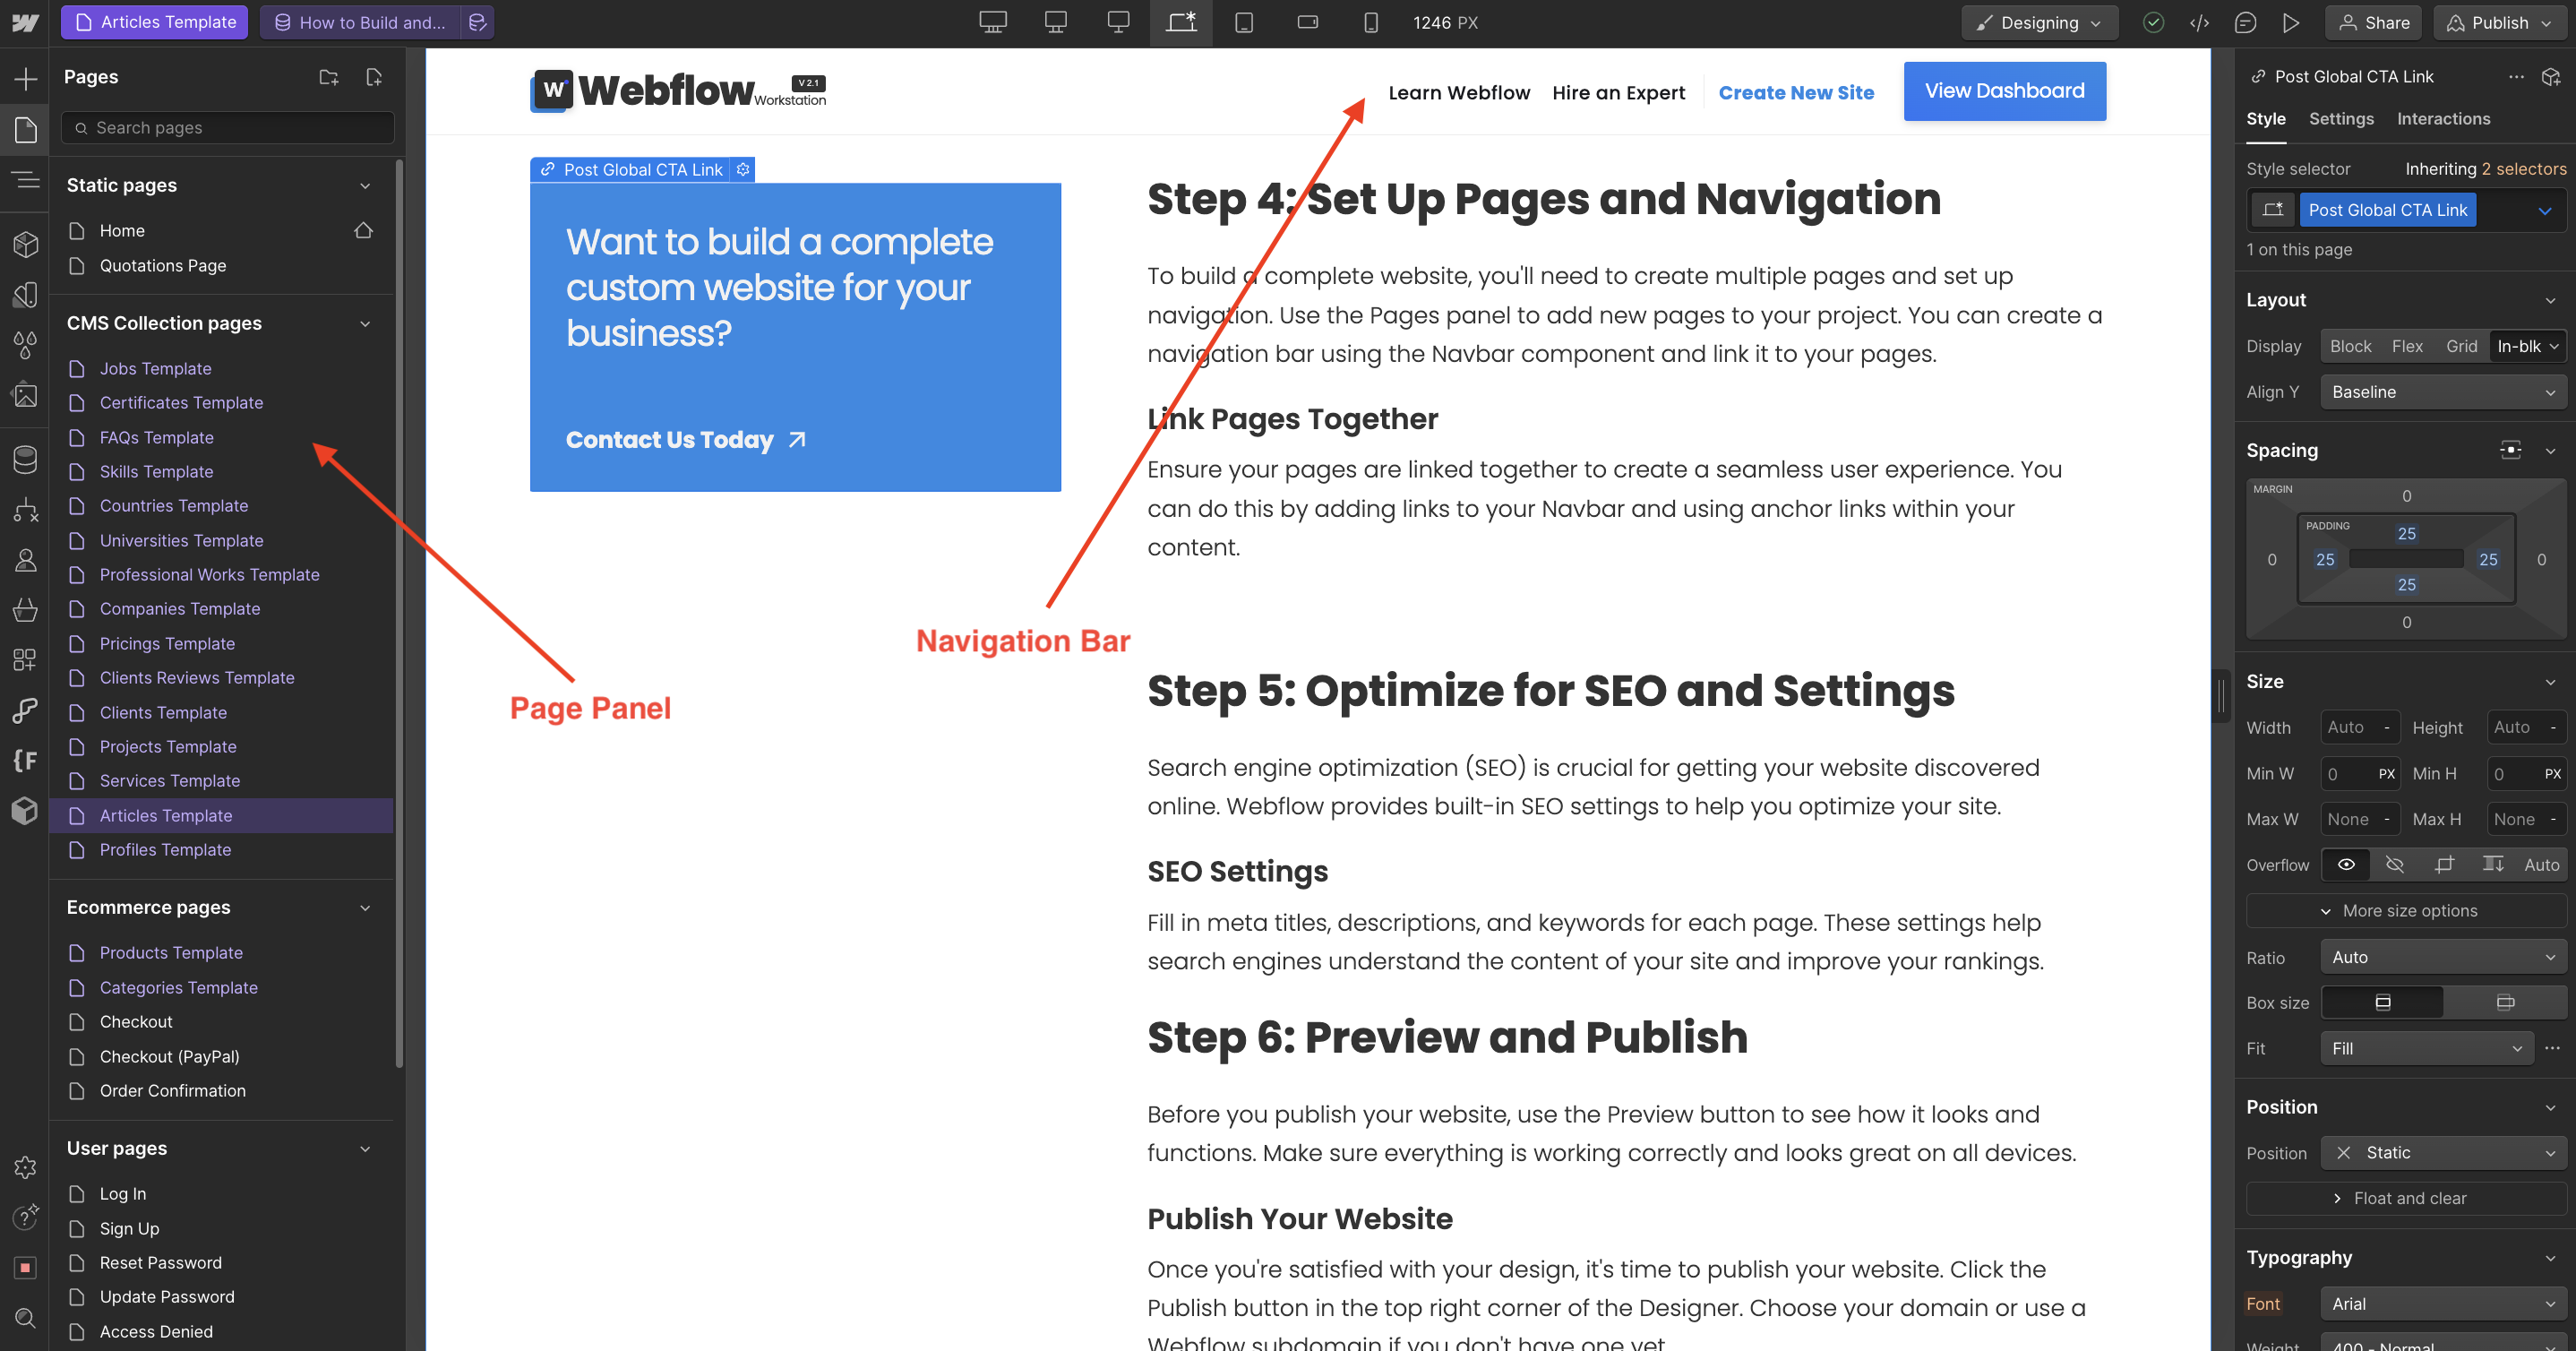
Step 4: Set Up Pages and Navigation
To build a complete website, you'll need to create multiple pages and set up navigation. Use the Pages panel to add new pages to your project. You can create a navigation bar using the Navbar component and link it to your pages.
Link Pages Together
Ensure your pages are linked together to create a seamless user experience. You can do this by adding links to your Navbar and using anchor links within your content.
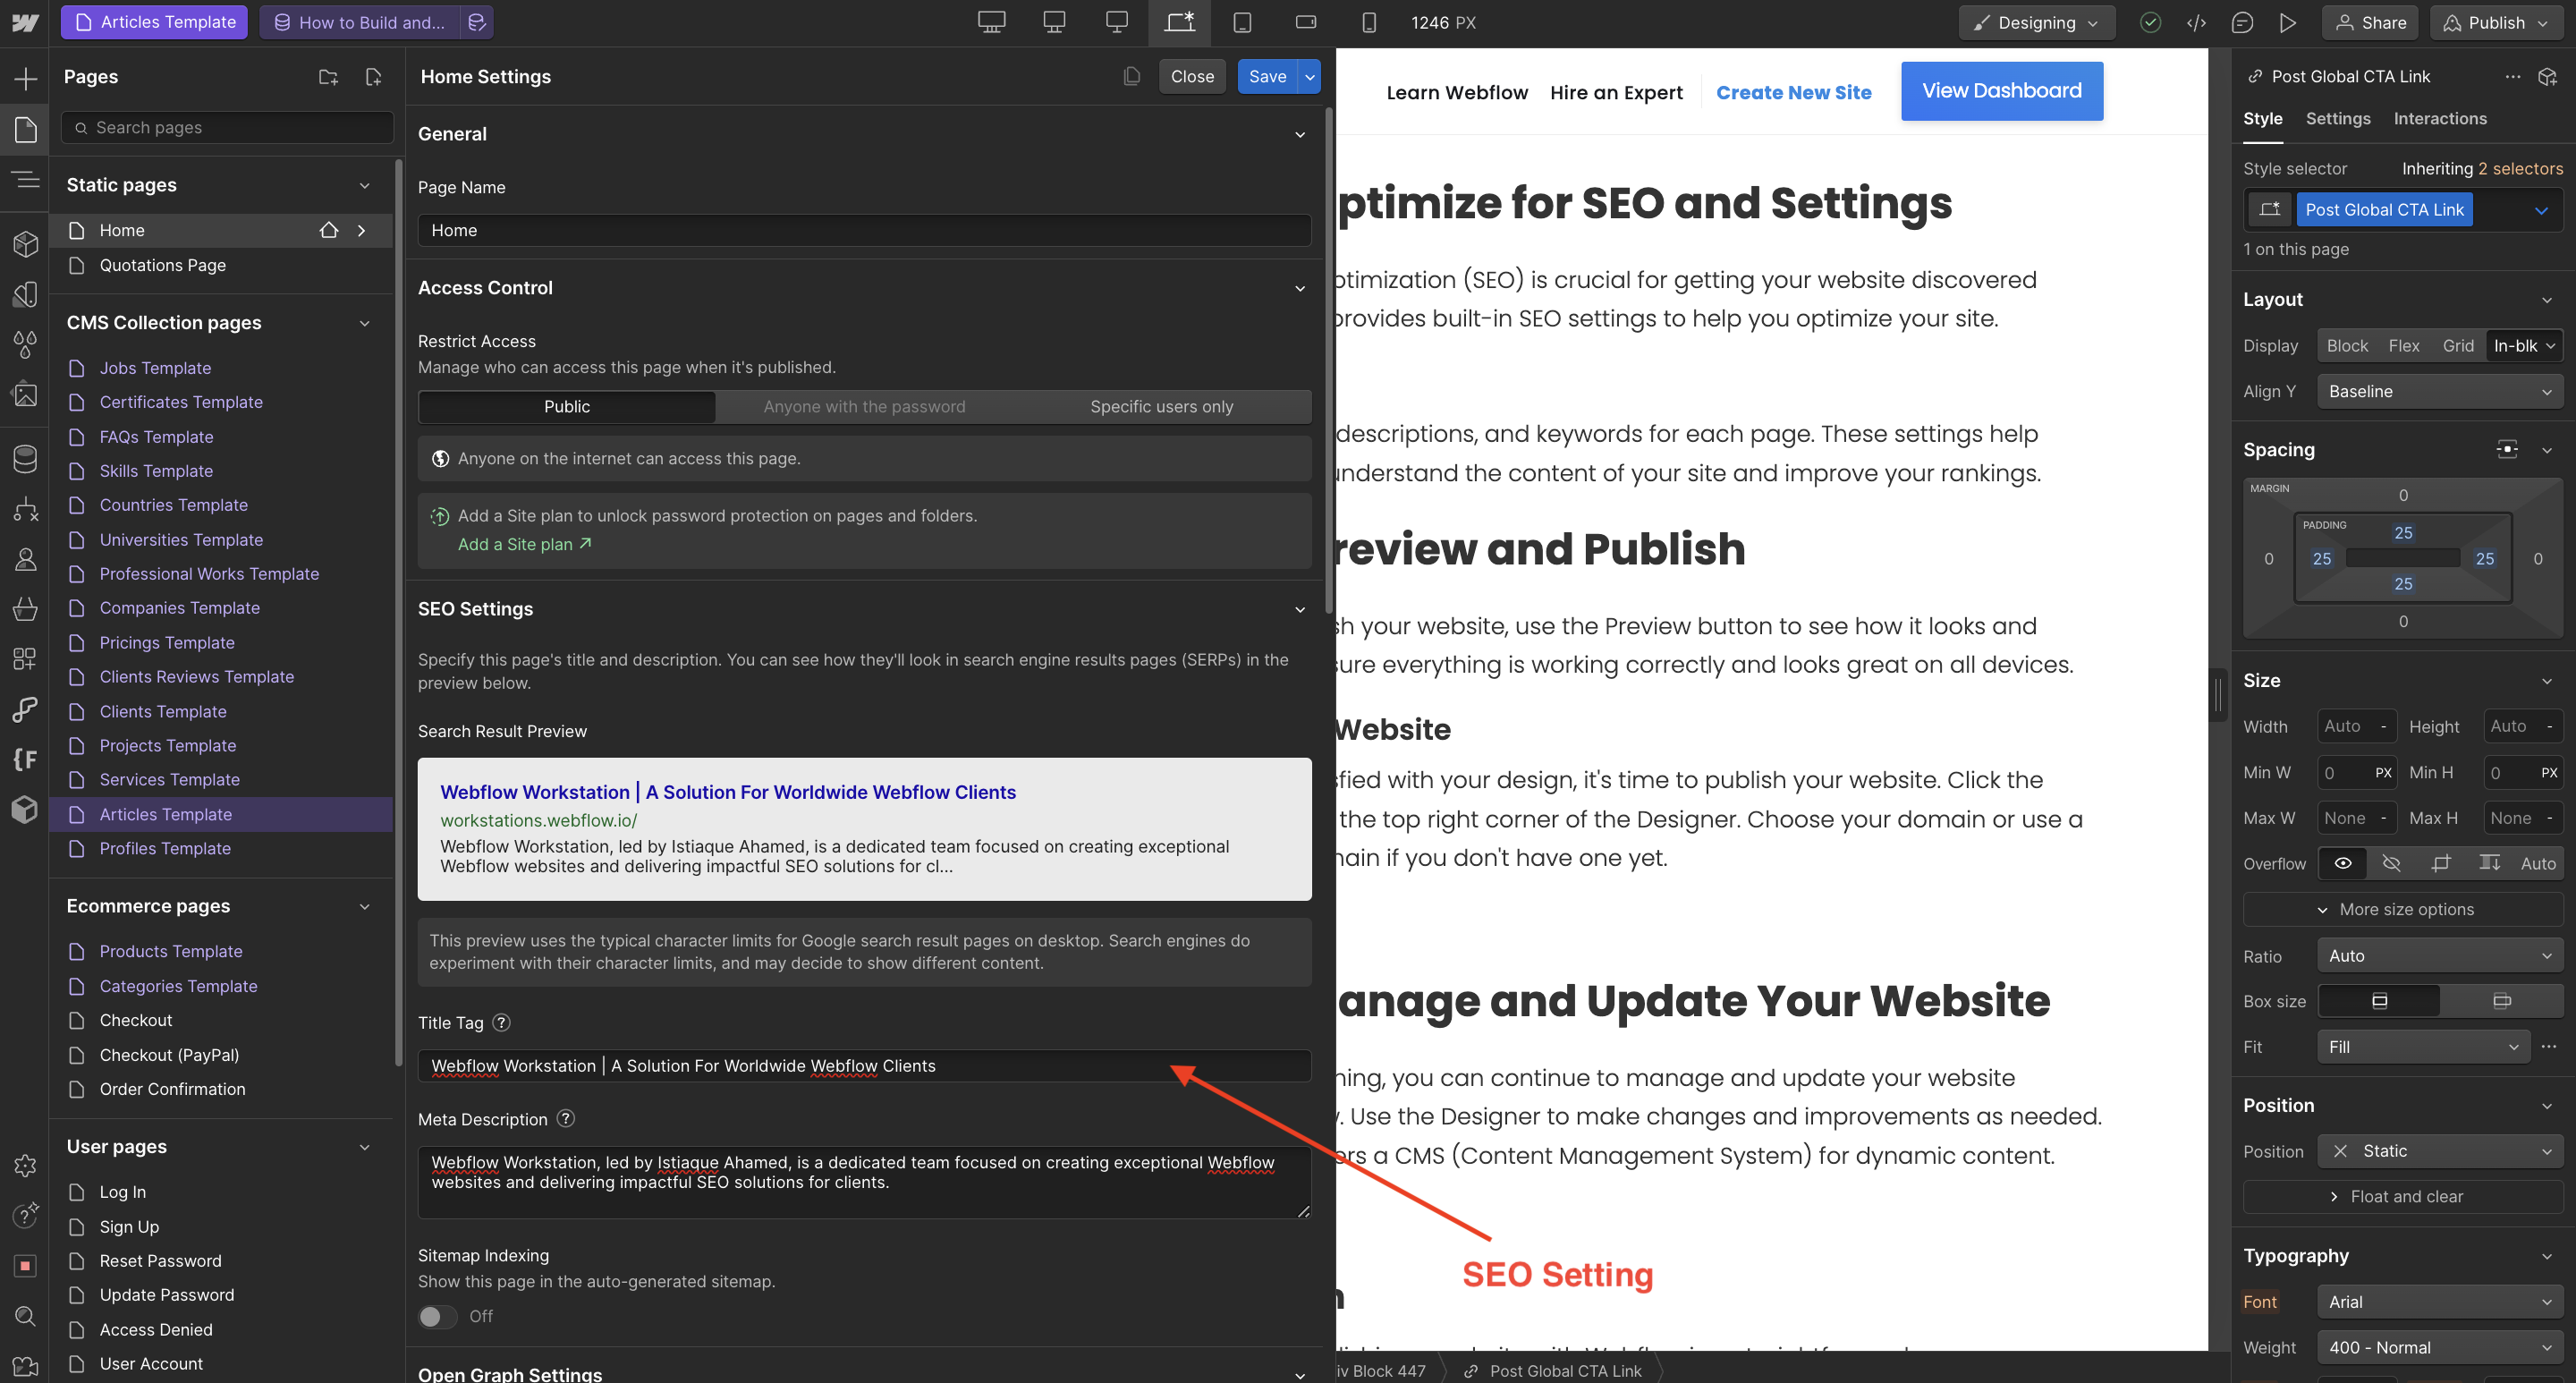
Step 5: Optimize for SEO and Settings
Search engine optimization (SEO) is crucial for getting your website discovered online. Webflow provides built-in SEO settings to help you optimize your site.
SEO Settings
Fill in meta titles, descriptions, and keywords for each page. These settings help search engines understand the content of your site and improve your rankings.
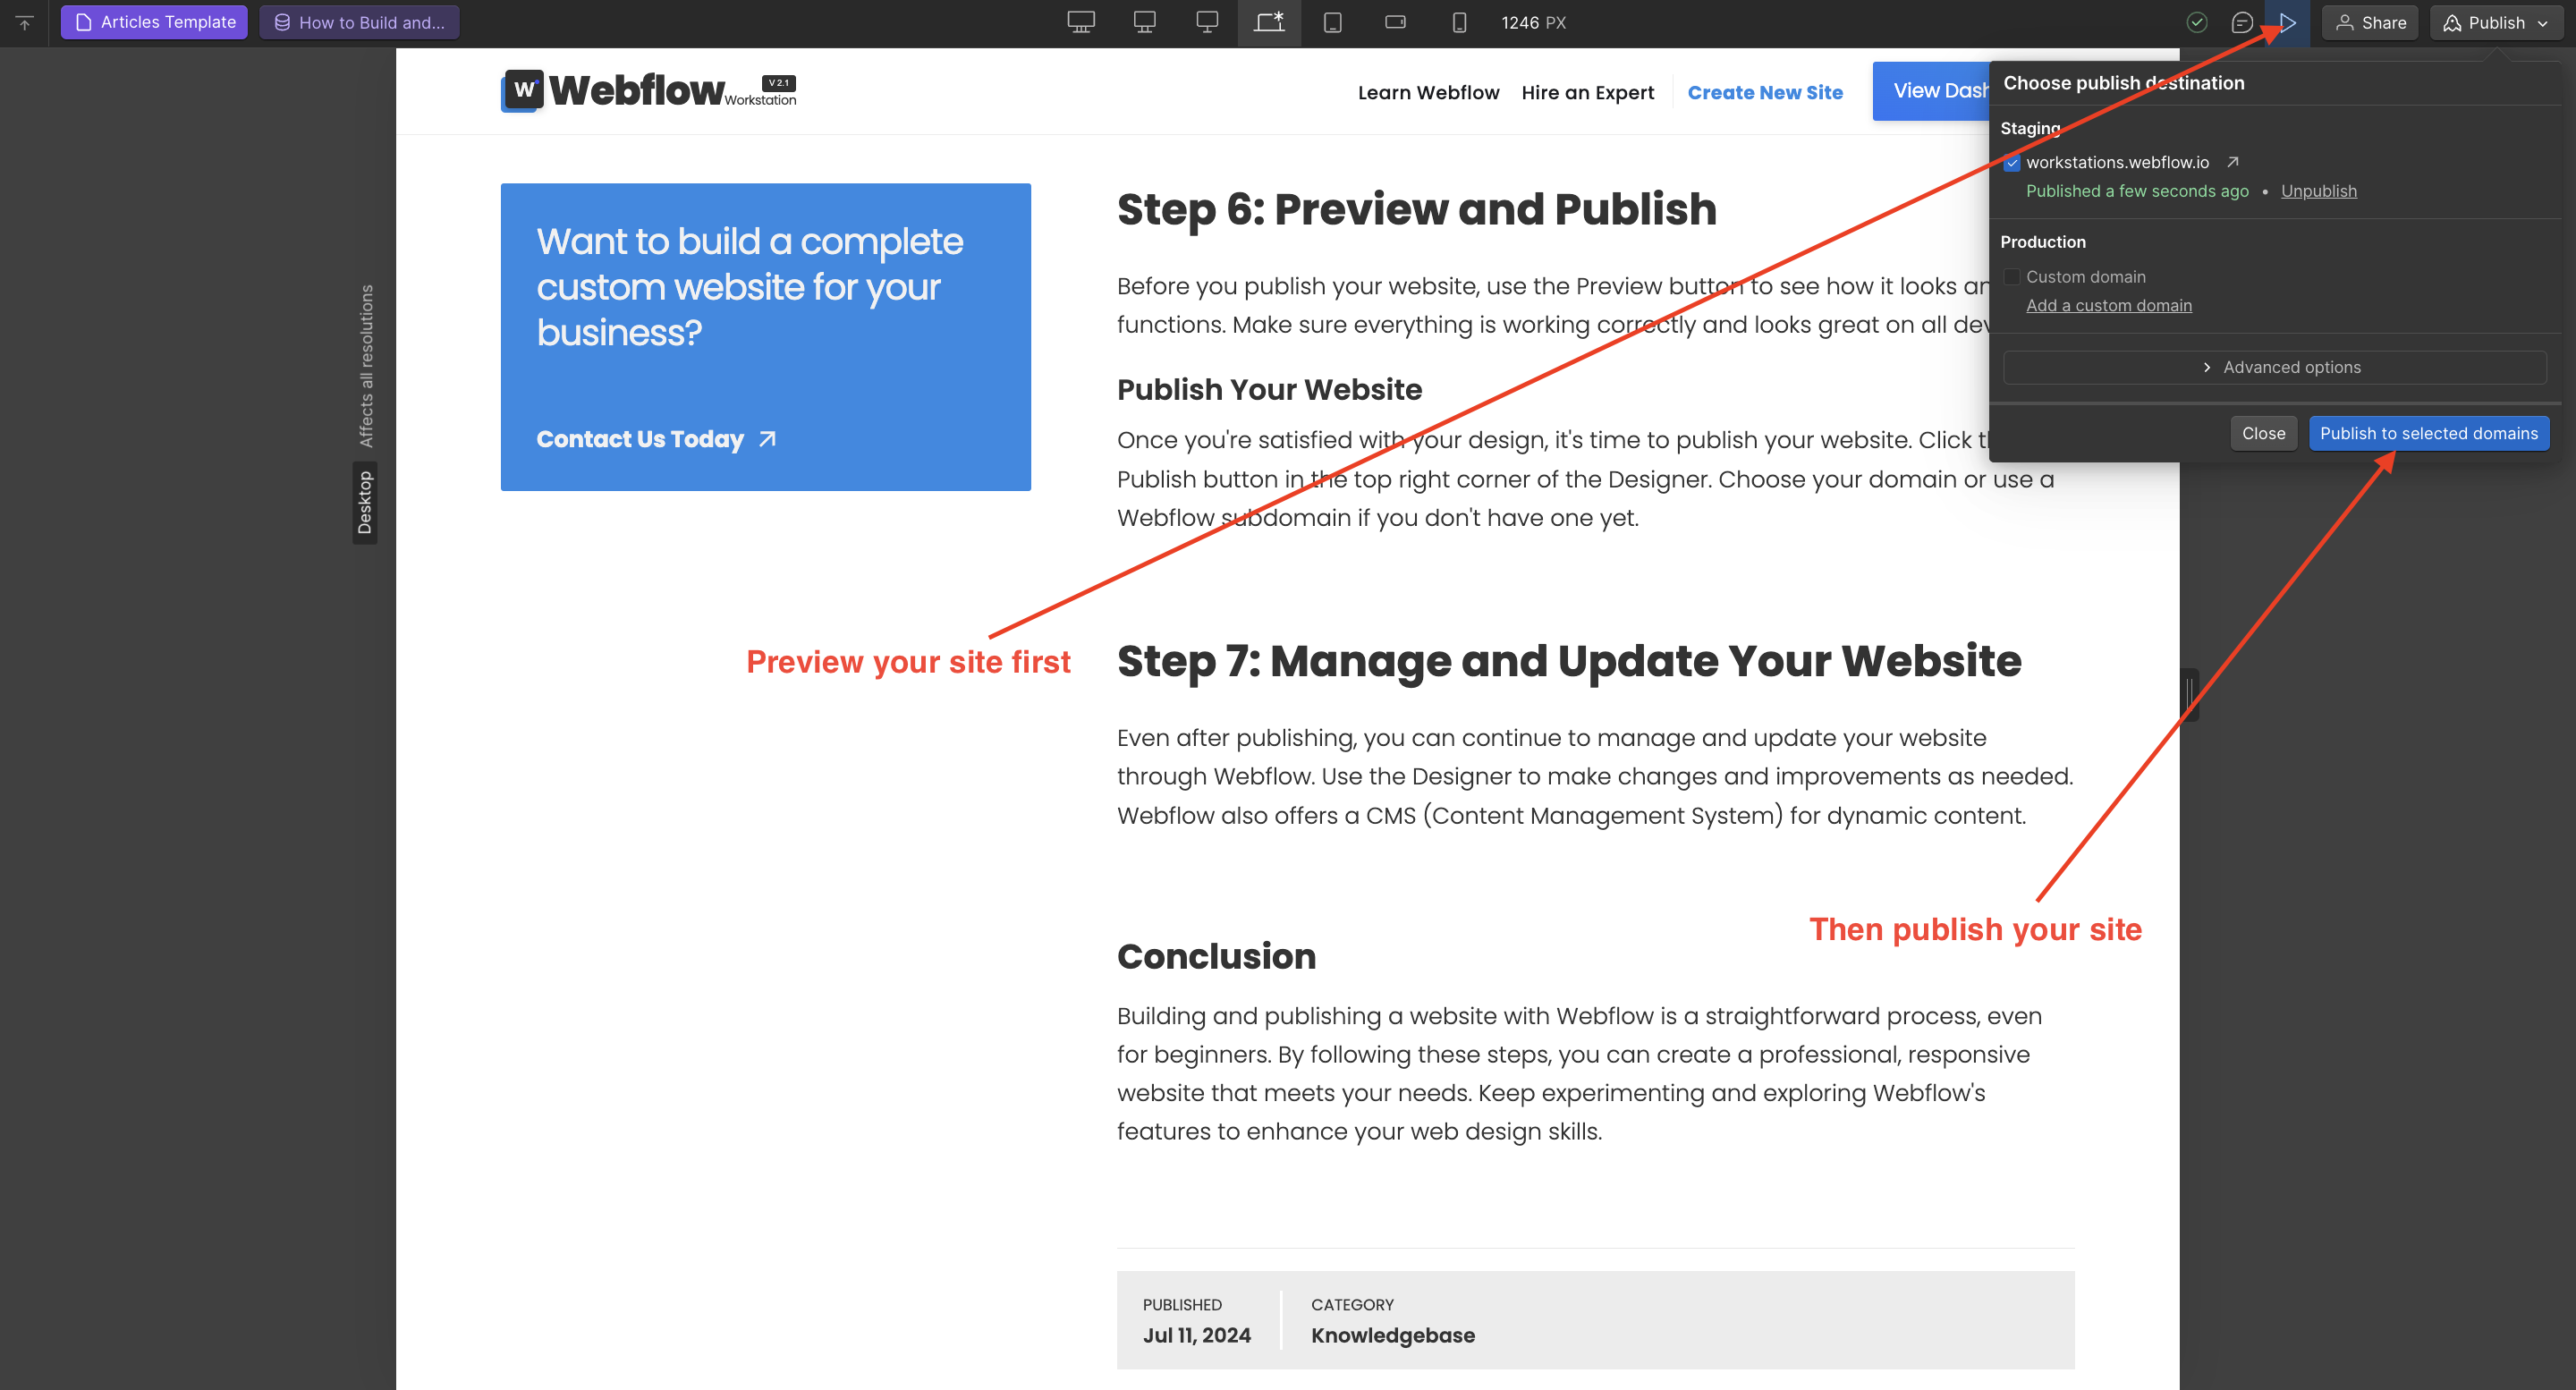
Step 6: Preview and Publish
Before you publish your website, use the Preview button to see how it looks and functions. Make sure everything is working correctly and looks great on all devices.
Publish Your Website
Once you're satisfied with your design, it's time to publish your website. Click the Publish button in the top right corner of the Designer. Choose your domain or use a Webflow subdomain if you don't have one yet.
Step 7: Manage and Update Your Website
Even after publishing, you can continue to manage and update your website through Webflow. Use the Designer to make changes and improvements as needed. Webflow also offers a CMS (Content Management System) for dynamic content.
Conclusion
Building and publishing a website with Webflow is a straightforward process, even for beginners. By following these steps, you can create a professional, responsive website that meets your needs. Keep experimenting and exploring Webflow's features to enhance your web design skills.


